Admin
The Admin dialog is used for project management operations that modify or remove data. It is intentionally hidden from the main navigation to prevent accidental use.
Opening the Admin dialog
Click the Admin button in the top-right corner of the application title bar. A confirmation is not required to open the dialog — destructive actions inside the dialog each have their own confirmation step.
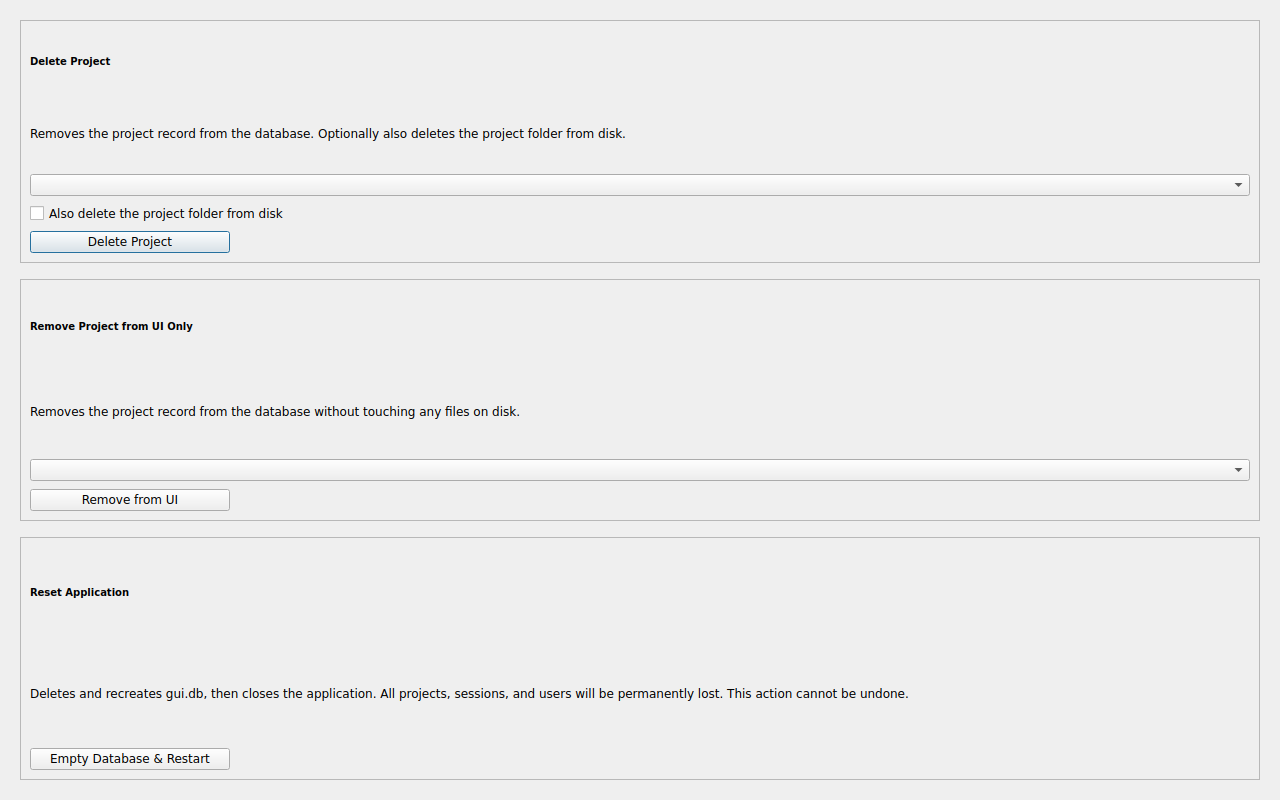
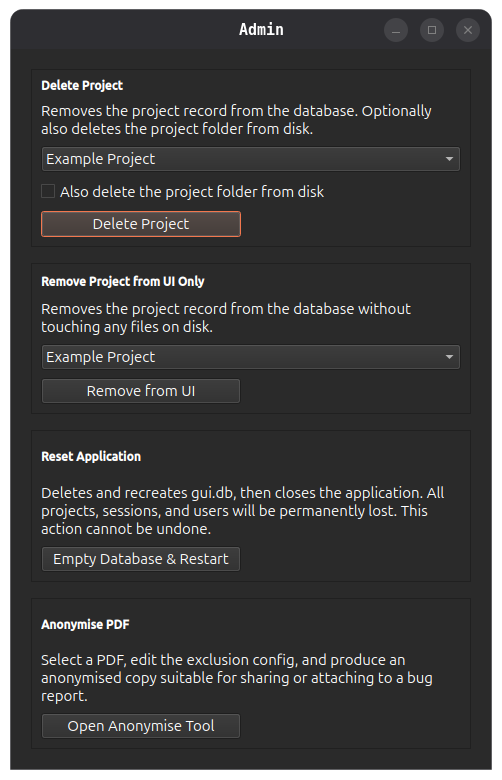
Delete Project
Permanently removes a project from both the openstan UI database and, optionally, from disk.
| Control | Description |
|---|---|
| Project drop-down | Select the project to delete. |
| Also delete the project folder from disk checkbox | When ticked, the project folder and all its contents are deleted from the filesystem after the UI record is removed. |
| Delete Project button | Initiates deletion after a confirmation dialog. |
This cannot be undone
If Also delete the project folder from disk is ticked, all statement PDFs, configuration files, and the project database are permanently deleted. Ensure you have a backup before proceeding.
Remove Project from UI Only
Removes a project from the openstan application database without touching any files on disk. The project folder remains intact and can be re-added later using Add Existing Project.
| Control | Description |
|---|---|
| Project drop-down | Select the project to remove. |
| Remove from UI button | Removes the project registration after a confirmation dialog. |
Use this option if you want to temporarily hide a project from the selector, or if you are moving a project folder and will re-register it from its new location.
Reset Application
Deletes and recreates the openstan application database (gui.db), effectively returning the application to a clean first-run state.
All project registrations are removed. Project folders on disk are not affected.
Click Empty Database & Restart to proceed. A confirmation dialog is shown before any action is taken. The application closes and must be restarted manually after the reset completes.
Use with care
After a reset, all projects must be re-added via Add Existing Project. The project data (statements, transactions) stored in each project folder is unaffected.
Anonymise PDF
Opens the Anonymise PDF tool for the currently active project.
| Control | Description |
|---|---|
| Open Anonymise Tool button | Opens the Anonymise PDF dialog, where you can select a PDF or folder, edit the exclusion config, and produce anonymised copies. |
Use this to create anonymised versions of PDFs that are safe to share or attach to a GitHub issue. The tool supports both single-file and folder batch processing. It is also accessible directly from the nav bar (primary entry point) or from any REVIEW or FAILURE row in the Debug Info dialog.
A project must be active
The button is only useful when a project is open. If no project is selected, an error dialog is shown.
View Logs
The View Logs section provides access to application and project log files for troubleshooting and diagnostics.
| Control | Description |
|---|---|
| View Application Log button | Opens the log viewer displaying application-wide events and diagnostics from the current session. Shows startup information, menu actions, and general errors. Always enabled. |
| View Project Log button | Opens the log viewer displaying project-specific operations, statement imports, parser diagnostics, and anonymisation details. Only enabled when a project is selected. |
For detailed information about logs, including how to find log files manually and how to share logs with support, see the Logging & Debugging Guide.
Logging Settings
The Logging Settings section controls diagnostic verbosity levels across the application and dependent libraries.
| Control | Description |
|---|---|
| Enable verbose mode checkbox | When checked, enables DEBUG-level logging (shows detailed per-field extraction, database operations, and library diagnostics from bank_statement_parser and uk_bank_statement_anonymiser). Useful for troubleshooting and when reporting issues to support. Changes apply immediately without restarting the app. |
| Help icon (question mark) | Hover to see a tooltip explaining verbose mode and when to use it. |
For more information, see the Enabling Verbose Mode section of the Logging guide.
Related Topics
- Logging & Debugging Guide – View and share logs, enable verbose mode
- Troubleshooting Guide – Common issues and solutions
- Project Management – Create and manage projects
- Anonymise PDF – Redact PDFs for safe sharing
- About Screen – Version and license information
- Privacy Policy – Data handling practices
- Community & Support – Report issues or ask questions